Showing posts with label nail design. Show all posts

Monday, July 2, 2012

Spider-man Nails for the Amazing Spider-man!

 Hey guys! This is Asa. I know that we have not been on since April (I believe) but here we are!
This time we have a superhero theme and to start it off, Spider-Man.
If you want to know more about Spidey, here's a link.
I googled various images of Spider-Man and his costume and came up with this nail design.


Here is another picture:


And here are the colors I used:

From L to R: Base COat by NK, Wet n Wild Everybody Loves Redmond, Wet n Wild Saved by the Blue, Nail art striper in black and white, Fast Dry Top Coat by NK


Tuesday, February 14, 2012

Anti-Valentine's Day Nail Art

Hola. Asa here again! I have made an anti-Valnetine's Day design. Ever suffered from a broken heart? This might be the design for you.

My base color is How I met Your magenta from WnW's fastdry collection. I used 2 coats but I still saw VNL (visible nail line).
Then I used a black crackle to create hearts.
I chose my ring finger as an accent finger and put studs on the tip. I used a top coat (I will post a review later this week of the top coat) to seal everything.


Valentine's Day Nail Designs

Hey guys! Asa here. I know I haven't posted in a WHILE but to make up for it I have a couple of nail designs and virtual cookies.

Here is the first one:
For this design, I used French Creme by WnW and some other WnW polishes. In order to make this design first put on a base coat of your choice. Then paint your nails with a white polish. Take a dotting tool or bobby pin and dip it in the polish of your choice and create a 'v' shape on the nail. It will create a heart shape. Add a top coat of your choice and enjoy your cute nails!


I just rotated this picture so it looks a bit weird. 

This design was also pretty simple. I mixed together a blue and white to make a sky blue color I wanted. You don't have to do this if you already have a sky blue polish. After the polish dries, use a dotting tool or a bobby pin to create clouds with a white polish. After the clouds dry, take a bobby pin or dotting tool to create hearts using a pink polish.

The design on my middle finger is actually from this awesome video by indigonova: http://www.youtube.com/watch?v=KgkUCdEzhCY
Please ignore the yellow polish on the side of my finger.

For this next design, I used a mix of a nude color, white shimmery polish, and a light pink shimmer I had. After the base color dried I used a blue polish to cover half my nail diagonally and then used a glittery striper to create a line between the pink and the blue. I used a bobby pink to place two pink dots and then used a pink striper to create 'c's around the dot. I also added green leaves around the roses.
Here is another picture:

Have a fun and romantic Valentine's Day! I know I'll spend it with my one true love: food.
I leave you all with this super adorbs Doctor Who gif.

Monday, January 23, 2012

Starry Night Nails (cutepolish tutorial)

Hey all!
This is Asa. 
I apologize for the lack of nail posts!

Not my gif. 

I just got finals week done with so whew. *Wipes brows*
So my post today is Starry Night Nails. I have always been fascinated with van Gogh's Starry Night and this fascination got even stronger with "Vincent and the Doctor" (Doctor Who episode). 
I found cutepolish's tutorial on Starry Night nails and they were very easy to replicate actually!
Here is my picture:

I wish I could put the TARDIS on one of the nails though. 


From Left to Right: NK Smoother Nails Ridge Filling Base Coat, WnW Saved by the Blue, WnW  Teal or no Teal,  WnW Rain Check, L.A. Colors Nail Art Brush, Topcoat (no brand).


Also, as a side note, for the rest of the nails that were not Starry Night, I layered Rain Check over Teal or no Teal because I thought that Rain Check was a bit sheer and not blue-y enough and that Teal or no Teal was too blue-y.
So, readers, I leave you with this nail art that I attempted.
Here's a gif of Emily Deschanel dancing.

Saturday, October 22, 2011

Alice in Wonderland Nail Design!


Hey, Asa here!
I have an Alice in Wonderland nail design here!
I actually used this picture to do my design.
Here are some pictures:


This is actually all the colors I had to use. From left to right: NK Top Coat, NK Base Coat,  Klassicolor in Pastel Teal, White striper, Revlon's 730 Valentine, black striper, L.A. Color Craze in Tropical Breeze, and Wet n Wild's Fuschia-Rama from their FastDry collection.

The ring finger is supposed to be the Chesire Cat's stripes and the other fingers are  Alice's Dress and the playing card symbols.

See you guys later with a Halloween nail design!


Saturday, October 1, 2011

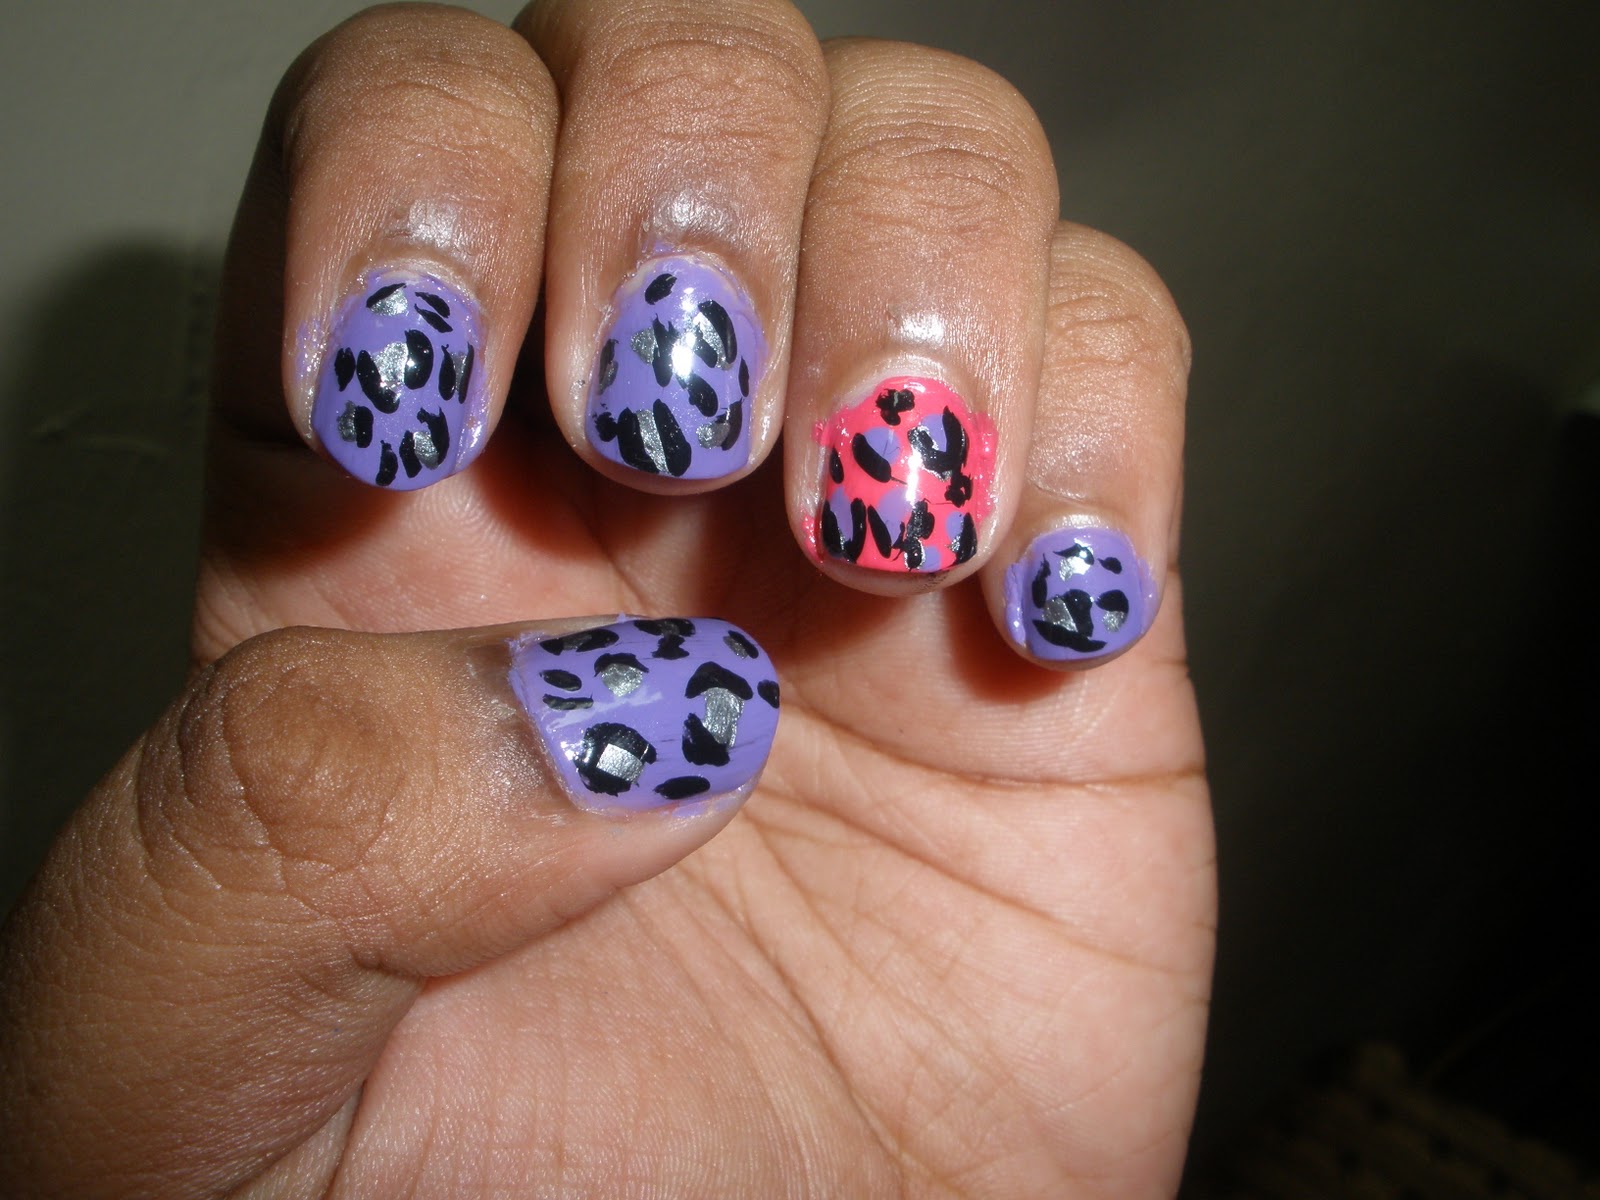
Pink Purple and Grey Leopard Print Nails! (pic heavy)

Asa again! This time with a nail art! So I decided to take a twist on the traditional leopard print and used purple and pink instead. I painted my nails with L.A. Colors color craze in Tropical Breeze but on my ring finger I used Sinful Color's Thimbleberry. On the purple nails, I used Love & Beauty's nail polish (from Forever 21) in "Grey" which is a metallic grey not a creme grey. I then made little "c"s (using a nail striper) around the grey dots and little spots of black on bare patches of purple. On my ring finger I used the purple color as dots and did the same with nail striper.
 I actually got a lot of compliments at school for this manicure. 

Anyways, on to the pictures! 
With flash:


 Without: 

 With flash:


Sunday, September 11, 2011

TARDIS Nail Design/Crackle Nails

Now, me (Asa) being a HUGE Doctor Who fan, I wanted to do a cool TARDIS nail design. However, I am also not as talented as everyone else.
But I did try to do a design.:

I decided to make a bow tie on my pinky because, well, bow ties are cool.
The glitter on the index finger was supposed to be the stars in a galaxy.
Here is another picture so you can see the glitter better:


I was sporting this design for about 2 days and no one in my school knew what a TARDIS was much less what Doctor Who was. It is my goal to find a DW in my school so I can discuss how Moffat continually messes with people's minds with his plot lines. 
Here are the colors I used:
From right to left: French White Creme from Wet n Wild, Wild Beauty Nail Paint in Black, Art Deco Nail Striper in yellow, and Wet n Wild's Saved by the Blue (from their Fast Dry collection).
The two colors that were not named were used for my crackle design on my left hand: (Sorry for a weird angle. It's really hard to take a picture with a DSLR using one hand).

I got the crackle from a random store somewhere in Uptown Manhattan. It was around $2.
The base color I used was Desert Dune from L.A. Colors and the Crackle is black.
I really like this crackles nail polish and at this price it was an amazing find.